
Theodore Lowe, Ap #867-859
Sit Rd, Azusa New York
Find us here
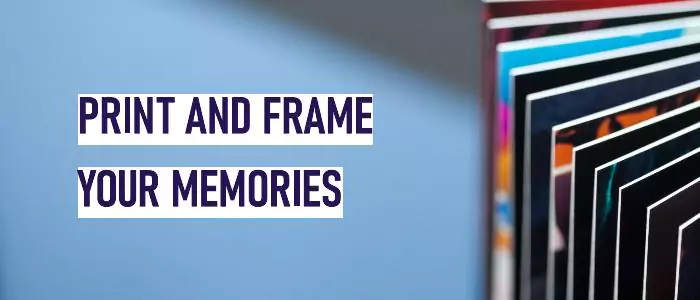
A Complete Guide to Printing and Framing Photos
Printing and framing pictures is the ideal way to turn memories into a visual chronology that breathes life into any space. Anyone can turn digital photos into eye-catching wall art if they have a firm understanding of the fundamentals, even though the process could appear intimidating at first.
Your photo's durability and visual attractiveness might be affected by the paper, printer, and frame you choose. This article will walk you through every stage, whether you're a hobbyist seeking to decorate your house or a professional photographer trying to promote work. After you've mastered the techniques of selecting the finest materials and matting and mounting, you'll be prepared to display your memories with assurance and flair.
The Magic of Physical Photographs
The allure of physical photographs is timeless. Beyond their tactile sensation, they enshrine moments in a tangible form. They connect us with our past, letting us hold pieces of history in our hands. Despite the digital revolution, the demand for printed photos endures, signifying that the charm of a hand-held memory is irreplaceable. Let's dive into the transformation of digital snapshots into enduring artifacts.
From Pixels to Print
Transforming digital images into prints is like bringing a story to life. The journey from pixels to print involves:
- Selecting images that speak to the heart.
- Choosing the right paper type to complement the picture.
- Finding a printing service that ensures color accuracy and quality.
- Deciding on the perfect size for the photograph to shine.
This transformative process gives digital memories a physical presence that can decorate a wall, sit on a desk, or be passed down through generations.
Why Physical Prints Endure In a Digital Age
|
Quality |
Emotional Connection |
Permanence |
|
Prints provide a level of detail and color depth that screens cannot always capture. |
Physical photos create a sense of nostalgia and make memories more palpable. |
Unlike digital files that can be lost to technology changes, prints remain accessible. |
Printed photos provide an unmatched experience. Physicality makes them immune to obsolescence. They continue to be cherished items in any home, telling stories that burst forth from their frames. This enduring preference highlights the value we place on material reminders of the people, places, and moments that define our lives.
Choosing the Right Photo Paper
Let's dive into the world of photo paper choices! With many options, picking the best one adds magic to your prints. Understanding these options is the key to outstanding framed photos.
Glossy vs. Matte Finishes
Photo paper finishes dramatically affect your image's look. Glossy finishes shine with vibrant colors and crisp details. They reflect light, making photos pop. Ideal for colorful landscapes or portraits, they do attract fingerprints and glare.
In contrast, matte finishes boast a non-reflective surface. They hide fingerprints and reduce glare, perfect for displaying in well-lit areas. Matte provides a soft, textured look, enhancing artistic photos or black and white images.
Understanding Paper Weight and Quality
Paper weight determines how thick and sturdy your photo feels. Measured in grams per square meter (g/m²), higher numbers mean thicker paper. Quality often aligns with weight. Thicker paper tends to last longer and resists curling over time.
|
Weight Range (g/m²) |
Quality Level |
|
Less than 150 |
Economy |
|
150-200 |
Standard |
|
200-300 |
Heavyweight |
|
More than 300 |
Premium |
Select a weight & quality that matches your display needs. Thicker, premium papers excel in galleries. Lighter weights fit everyday photo printing. Remember, the right photo paper takes your prints from good to great!
Printing At Home vs. Professional Services
Choosing how to print and frame photos can be tricky. Some prefer the charm of printing at home, while others swear by professional services. It depends on your needs, budget, and quality expectations.
Equipment and Supplies You'll Need for DIY Printing
Printing at home gives you control and instant results. You'll need the right equipment and supplies. Let's talk about the essentials:
- High-Quality Printer: An inkjet printer works best for sharp photo prints.
- Printing Paper: Choose from glossy, matte, or luster finishes.
- Ink Cartridges: Invest in high-grade printer ink for vivid colors.
- Photo Editing Software: Adjust your photos for perfect prints.
- Calibration Tools: Ensure your screen and prints match.
Benefits of Professional Printing Studios
Professional printing services offer unbeatable quality. Find out their top benefits:
|
Benefit |
Description |
|
Expertise |
Professionals know the best materials and techniques. |
|
High-Quality Equipment |
Studios use advanced printers for stunning results. |
|
Variety of Options |
Diverse paper types and framing options available. |
|
Longevity |
Prints last longer due to professional-grade inks and papers. |
|
Time-Saving |
Skip the hassle and let experts handle everything. |
Color Management for Accurate Reproduction
Color management is essential when printing and framing photos. It ensures that the colors in your printed photos match the original digital image. This section of the guide dives into how to calibrate your printer and work with color profiles for accurate color reproduction.
Calibrating Your Printer for Consistent Results Section
Calibrating Your Printer for Consistent Results
To ensure colors stay true from screen to print, calibrate your printer. This process adjusts your printer settings for precise color output.
- Use calibration tools. These devices measure printed colors against correct values.
- Print a test page. It provides a basis for adjustments.
- Adjust printer settings. Align them until the test print matches your monitor.
Regular calibration keeps colors consistent over time.
Working with Color Profiles
Color profiles describe how colors translate from a digital file to print. They ensure color accuracy across devices.
- Select the right profile. It depends on your printer and paper type.
- Install the profile. Add it to your computer's color management system.
- Configure software. Set your photo-editing software to use the profile.
With correct profiles, what you see on the screen is what you get in print.
Selecting a Frame for Aesthetics and Preservation
Welcome to the nuanced world of photo framing! Selecting the right frame is critical for both the look and longevity of your photograph. With a careful blend of aesthetics and preservation, you can enhance your space while protecting your memories. Let's dive into how to pick the perfect frame for your photos.
Matching Frames to Your Decor
Your frame should complement both the photo and your room. Here are some tips:
- Consider color: Choose a frame that echoes colors in your décor.
- Analyze style: Modern rooms benefit from sleek frames, whereas traditional spaces suit ornate designs.
- Size wisely: Big walls need larger frames; smaller spaces, subtler frames.
Protective Qualities of Different Frame Materials
Frames do more than just look good; they protect your photos. Here's how different materials stack up:
|
Material |
Protection Level |
Aesthetic Appeal |
|
Wood |
Good - natural insulation |
Warm and classic |
|
Metal |
Excellent - sturdy |
Modern and sleek |
|
Acrylic |
Varied - depends on quality |
Flexible and contemporary |
Different materials also offer unique preservation features. UV-resistant glass and acid-free mats further safeguard your photos from fading and deterioration. Always choose the best protection your budget allows to keep those precious moments vibrant for years to come.
Hanging and Displaying Your Framed Photos
Once you've chosen the perfect frame for your photos, it's time to show them off. Properly hanging and displaying them turns your walls into a personal gallery. Learn the best ways to make your framed photos pop and ensure they stay secure on your walls.
Best Practices for Wall Mounting
Mounting photos on the wall correctly is important. Here are tips to ensure they look great and stay put:
- Find the Stud: A stud finder helps you locate the wall studs for a secure anchor.
- Use the Right Hardware: Select hooks, nails, or screws that can carry your frame’s weight.
- Keep it Level: Use a level tool to hang your photo straight.
- Avoid Sunlight: Prevent photo damage by not placing them in direct sunlight.
Creative Alternatives to Traditional Hanging
Think outside the box for a unique touch to your space:
- Photo Ledges: Set framed photos on a chic floating ledge.
- Clipboards: Display photos on clipboards for an industrial vibe.
- String and Pegs: Hang your memories on a string with decorative pegs.
- Magnetic Boards: Use magnets to easily swap out framed photos.
|
Mounting Method |
Description |
Best For |
|
Adhesive Strips |
No nail holes, perfect for renters. |
Lightweight frames |
|
Gallery Wall |
A collection of various sized photos. |
Large empty walls |
|
Easels |
Freestanding display method. |
Desks and shelves |
Create a lasting impact with the way you showcase your photos. Wall mounting with care or choosing a creative display makes your space uniquely yours.
Caring For Your Printed and Framed Photos
Your cherished memories deserve the utmost care. Whether they adorn your walls or rest on your shelves, printed and framed photos capture moments in time. But they can fade, discolor, or deteriorate without proper attention. Learn how to preserve and protect these treasures effectively.
Routine Cleaning Tips
Keep your photos looking spotless and vibrant with these simple steps:
- Dust frames regularly with a soft, dry cloth. Avoid harsh chemicals.
- Use a gentle glass cleaner for the frame's glass. Spray on the cloth first.
- For acrylic glazing, opt for an acrylic-specific cleaner.
- Clean the print's surface with a soft brush or canned air. Be gentle.
Protecting Against Environmental Damage
Environments affect your photos. Take steps to keep them looking fresh and alive:
- Hang photos away from direct sunlight to prevent fading.
- Avoid areas with high humidity to prevent moisture damage.
- Keep them in a stable temperature. Fluctuations can cause harm.
- Consider using UV-filtering glass in frames for added protection.
Conclusion
Embracing the art of printing and framing photos uplifts your cherished memories, transforming them into tangible keepsakes. With the steps outlined in this guide, you'll confidently select the best materials and techniques. Start the journey of giving your digital snapshots a place of honor in your home—print, frame, display, and relive your favorite moments every day.
Related blog posts
Low Angle Photography Tips
For stunning low angle photography, get close to the ground and use a wide lens. Experiment with perspectives to add a sense of grandeur or power to your subject.

Clipping Path Associate has empowered businesses globally for over 12 years. A passionate team is dedicated to providing meticulous photo editing services. Expertise is offered in a range of areas, from precise clipping paths to flawless image retouching. The company offers straightforward yet impactful solutions tailored for photographers, e-commerce enterprises, advertising agencies, web design firms, magazine publishers, printing companies, and more.
We Accept : 