
Theodore Lowe, Ap #867-859
Sit Rd, Azusa New York
Find us here
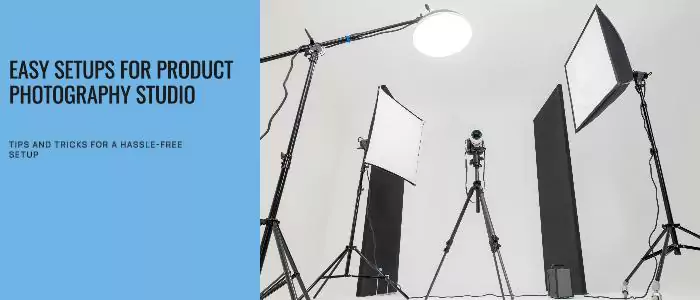
Easy Setups of Product Photography Studio
Creating captivating product photos doesn't have to drain your budget or require professional studio equipment. Entrepreneurs, bloggers, and small business owners alike can produce high-quality images with a few clever tricks and a dash of creativity. These studio setup hacks can make a world of difference, bringing out the best in your products with minimal investment.
Stunning images are accessible whether you're marketing the newest technology on your tech blog or selling handmade goods on Etsy. Product photos that are both visually appealing and engaging are crucial for drawing in customers and increasing sales. Anyone may produce compelling and eye-catching product images that equal those taken in a fully furnished professional studio by putting these easy yet efficient photography solutions into practice. Let's look at these simple tips that will turn your home studio into a powerful tool for producing eye-catching product photos.
Introduction to DIY Product Photography
Imagine taking stunning product photos with just simple tools around you. DIY product photography makes this possible. You don't need expensive cameras or fancy studios. Instead, explore easy hacks to create eye-catching images right from the comfort of your home. Our guide unveils seven clever set-up tips for producing professional-looking product photos without breaking the bank.
The Myth of High-end Gear
Many believe only high-priced equipment can produce excellent photographs. This is a myth. Great images emerge from skill and imagination, not just the price tag of your gear. A well-lit space and a smartphone are powerful enough to capture amazing product shots.
The Power of Creativity
Creativity triumphs over costly gadgets. With a touch of innovation, everyday items transform into props and tools for photography. White sheets become diffusers; cardboard boxes turn into light reflectors. Harness these simple elements, and let creativity lead your photography journey.
- Use natural lighting to your advantage.
- Experiment with different backdrops.
- Try inventive angles and compositions.
- Employ household items as props.
- Adjust and edit photos with free apps.
Natural Light Mastery
Natural light can elevate your product photos without spending a dime. Mastering it means understanding when and how to use it to your advantage. Grasp these simple concepts, and watch your photos transform from flat to fabulous. Use these two hacks to manipulate natural light and create stunning images that jump off the screen.
Harnessing the Golden Hour
The golden hour-that magical time just after sunrise or before sunset-provides soft, warm light. It makes products look inviting. Here's how to use it:
- Plan your shoot during these times
- Place your products outside
- Let the natural glow do the work
Remember, the golden hour light changes fast. Stay prepared to capture your shots quickly.
Diffusing Light with Common Items
Soft light flatters your products. Here's how to diffuse harsh sunlight with things you already have:
|
Item |
Effect |
|
White bed sheet |
Subtle diffusion |
|
Paper towel |
Softer shadows |
|
Frosted shower curtain |
Gentle, even light |
Place your chosen diffuser between the light and your product. Adjust until the shadows soften and your photo looks just right.
DIY Tripod Alternatives
Let's turn the spotlight on 'DIY Tripod Alternatives'. Getting the perfect shot doesn't always require a fancy tripod. Sometimes, ingenuity is all you need. With objects you can find around your home, you can create stable and intriguing setups for product photography. Let's explore how you can capture studio-quality images without breaking the bank.
Stable Shots with Household Objects
To achieve stability without a tripod, use everyday items. Here are a few ideas:
- Books: Stack them high for a makeshift tripod.
- Cans: Secure your camera between two cans.
- Rice Bag: Mold it to fit your camera's shape.
Each method keeps your camera steady. Steady shots mean clear photos.
Innovative Angles on a Budget
Don't limit your creativity by not having a tripod. Try inexpensive tricks for unusual angles:
|
Object |
Angle Tip |
|
Chair |
Turn it sideways for a raised, slanted base. |
|
Ladder |
Get above your subject for a top-down view. |
|
String |
Attach the camera and hang for aerial shots. |
These methods are not only affordable but also easy to set up. Perfect for photographers of all levels.
Homemade Backdrops and Sets
Turn your simple space into a photography studio with some DIY magic. You don't need expensive setups to capture stunning product shots. Use these hacks to create professional-looking backdrops and sets. Watch your products pop with images that draw viewers in. All this with items already at your fingertips.
Crafting Seamless Looks
Create a flawless backdrop using just paper and some tape. A large roll of white craft paper serves as an infinite backdrop. Unroll the paper and let it flow down to the floor, creating a natural curve. This curve eliminates harsh lines and shadows, ensuring a clean, seamless look. Use clamps to secure the paper and tape to keep the backdrop in place. Your photos will boast a smooth, distraction-free background that makes your products shine.
Utilizing Color for Mood
Colors influence emotions and can set the mood for your product photos. Choose colors that complement your product and evoke the desired feeling. For a lively, energetic mood, pick vibrant colors like red or yellow. For a calm, tranquil vibe, go with cooler shades like blue or green. Experiment with different colored fabrics, wrapping paper, or even colored lights. These can be arranged behind your product to create striking visuals. By mixing and matching colors, you create a unique atmosphere that highlights your product.
Creative Lens Solutions
Unlock the potential of everyday objects to enhance your product photography lens game. Even without high-end gear, stunning visual effects await. Discover simple tricks to create professional macro shots and dreamy bokeh backgrounds!
Macro Shots with Magnifiers
Expensive macro lenses can pinch the pocket. Consider magnifying glasses for close-up clarity. This hack brings small details into sharp focus, perfect for showcasing product textures and features.
- Place a magnifier in front of your camera's lens.
- Secure it with tape for hands-free operation.
- Experiment with different magnifications to capture intricate details.
No magnifier? No problem. Smartphone users amplify small subjects by dropping water onto the camera lens. This droplet works like a lens, magnifying the minute intricacies of your product.
Bokeh Effects Using Foil
Bokeh backgrounds transform ordinary product shots. Achieve this magical look with nothing more than kitchen foil.
- Crumple foil into balls, and then flatten it out to create texture.
- Place it behind the product.
- Shine a light through the foil to create captivating light patterns.
Experiment with colored lights for vivid bokeh, or use a flashlight for classic white sparkle. Captivating shots are at your fingertips with these easy, cost-effective lens solutions.
Effective Product Placement
Effective product placement transforms ordinary item shots into eye-catching images. It's all about where you position your product in the frame. Small tweaks can turn a simple photo into a powerful visual story. You don't need fancy gear for that. Use these creative studio setup hacks to make your product photos stand out. Let's dive into the art of composition and storytelling with props.
The Rule of Thirds in Composition
Imagine your image is divided into nine equal segments by two vertical and two horizontal lines. Place your product along these lines, or at their intersections. This technique catches the viewer's eye more naturally, making the photo feel more dynamic and engaging. In essence, the rule of thirds guides you to avoid placing your product smack in the center, and instead, encourages you to find a visually appealing balance.
Creating Stories with Props
Props breathe life into product photos. They shouldn't distract, but rather complement the main item. Pick props that match the story your product tells. For instance, a hand written note beside a vintage pen or fresh citrus fruits around a bright blender. Here are some tips:
- Choose props with colors that blend or contrast nicely with the product.
- Keep the setting relevant to the product's use or values.
- Arrange props to lead the eye towards your main item.
Remember, every detail in your photo should feel intentional. Use effective product placement to create captivating images that need no high-end equipment to stand out.
Post-production Tricks
Snapping great product shots is just part of the journey. The real magic unfolds with post-production tricks. Even without fancy tools, these simple hacks can transform good photos into great ones. Ready to get started? Follow these tips to give your product photos that professional sheen.
Basic Editing With Free Software
Professional results don't always need expensive software. Free tools like GIMP or Canva offer robust features. Use them to adjust brightness, contrast, and saturation. Your goal is to make your product pop without going overboard.
- Crop to the best composition
- Fix lighting and shadows
- Sharpen the image for clarity
Upscaling Images Responsibly
Want to make your images bigger without losing quality? Use tools like Adobe Spark or letsenhance.io. They help you upsize photos while maintaining sharpness. Remember to start with the best quality original. This ensures a top-notch result.
- Choose the highest resolution for the original photo
- Upscale in small increments
- Check for artifacts or blurring each step
Conclusion: Letting Your Creativity Shine
Captivating product photography doesn't need expensive gear. It's about unleashing your creative potential. Embrace the following studio setup hacks and watch your product photos transform. Your creativity will make images stand out.
Beyond Techniques: Developing Your Style
Mastering the mechanics of great product photography is one thing. But developing a signature style? That's where true artistry lies. Your unique approach to lighting, composition, and editing sets your photos apart. Experiment with the tips shared, and allow your own style to evolve naturally.
A Recap of Key Takeaways
- Use natural light to your advantage for a soft, organic look.
- Reflectors and diffusers made from everyday materials can alter light quality.
- DIY backdrops create the perfect setting for any product.
- Play with angles and compositions for interesting visual narratives.
- Inexpensive lenses or even smartphone cameras can yield high-quality images.
- Editing apps enhance photos without the need for complex software.
- Patience and practice refine your techniques and your unique style.
Conclusion
Captivating product photography doesn't demand deep pockets or a studio brimming with high-end gear. Our seven simple hacks prove that creativity and resourcefulness can produce stunning results. Your journey to eye-catching images starts now – embrace these tips and watch your product shots transform.
Related blog posts
Low Angle Photography Tips
For stunning low angle photography, get close to the ground and use a wide lens. Experiment with perspectives to add a sense of grandeur or power to your subject.

Clipping Path Associate has empowered businesses globally for over 12 years. A passionate team is dedicated to providing meticulous photo editing services. Expertise is offered in a range of areas, from precise clipping paths to flawless image retouching. The company offers straightforward yet impactful solutions tailored for photographers, e-commerce enterprises, advertising agencies, web design firms, magazine publishers, printing companies, and more.
We Accept : 