
Theodore Lowe, Ap #867-859
Sit Rd, Azusa New York
Find us here
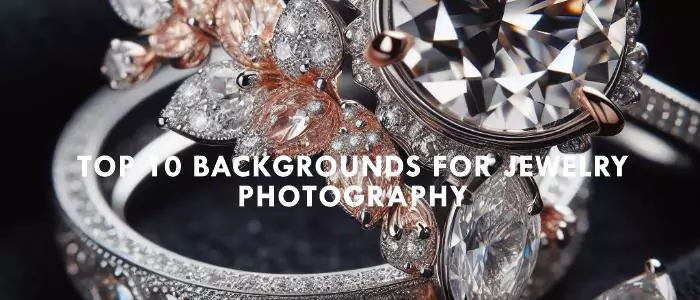
Top 10 Backgrounds for Jewelry Photography
Capturing the allure of jewelry requires a background that complements its shine and design. Photographers often opt for a white background due to its clean look that highlights the item. A black background, on the other hand, brings out the jewelry's sparkle, making gemstones and precious metals pop.
Gradient backgrounds offer a dynamic feel and depth, enhancing the piece's visual appeal. Reflective surfaces create an elegant and luxurious atmosphere, while natural settings showcase jewelry in an organic and relatable context. Textured backdrops add interest and context, enabling the jewelry to stand out. Vintage environments impart a timeless charm, appropriate for antique pieces. For a contemporary look, minimalist backgrounds draw the viewer's focus squarely on the jewelry. Patterned backdrops can be tricky but, when used subtly, contribute to a brand's storytelling. Branded backgrounds effectively communicate the jewelry's identity and correlation with the brand image, reinforcing brand recognition. Choosing the perfect backdrop is a strategic decision that has a profound impact on the product's perceived value and appeal.
The Essence of Choosing the Right Background
When capturing the allure of jewelry, the background plays a key role. It's not just about snapping a photo; it's creating a vision that enhances the jewelry's beauty. A well-chosen background can make all the difference, setting the stage for the jewelry to shine. To connect with your audience, the background you select must complement the jewelry's message.
How Backgrounds Impact Jewelry Perception
Backgrounds create mood and context. They can help focus attention on the jewelry or tell a story about the piece's elegance or uniqueness. High-contrast backgrounds can make diamonds sparkle more, while softer tones might better suit vintage pieces. It's a fine balance, as the wrong background can distract or detract from the piece's appeal.
- Contrast: Ensures the jewelry stands out.
- Texture: Adds depth and interest to the image.
- Color: Complements or accents the jewelry's tones.
Elements of an Effective Jewelry Photograph
|
Element |
Description |
Example |
|
Lighting |
Highlight the sparkle and details. |
Soft, diffused light |
|
Focus |
Ensure sharpness where it counts. |
Focus on the gemstone |
|
Composition |
Create visual interest. |
Rule of thirds |
|
Background |
Reflect the piece's style and mood. |
Neutral colors for modern pieces |
Classic Black Velvet: Timeless and Elegant
Classic black velvet serves as an exemplary backdrop for jewelry photography. Its rich texture and deep color highlight the brilliance and shine of any jewelry piece, from sparkling diamonds to lustrous pearls. This backdrop isn't just popular; it's a professional standard that brings out the beauty in precious items.
Advantages of Black Velvet for High Contrast
- Enhances Jewelry Shine: The dark surface makes gems and metals gleam.
- Eliminates Reflections: Velvet minimizes unwanted glares from lights or flash.
- Focuses Attention: Eyes naturally draw towards the highlighted jewelry.
Best Practices for Using Black in Jewelry Photography
To capture that perfect shot, consider these best practices:
- Clean Jewelry Thoroughly: Dust and fingerprints show up on black.
- Control Lighting: Use diffused, soft light to reduce harsh shadows.
- Consistent Color Balance: Adjust camera settings to ensure true black tones.
White Infinity Sweep: The Professional's Choice
Seeking perfection in jewelry photography? Meet the white infinity sweep. This backdrop is a firm favorite among professionals. Its simplicity and elegance highlight every detail. A white infinity sweep captures the beauty of jewelry without distraction.
Creating a Seamless Look with White
The white infinity sweep excels in creating a continuous, curve less background. This feature means no angles or shadows that could take attention away from the jewelry. A seamless look showcases the product's true luster. Here's how to set up:
- Curve the sweep gently to avoid creases.
- Place the jewelry at the center.
- Ensure even lighting to avoid shadows.
Tips for Achieving Pure Whites in Photos
True white backgrounds make images pop and seem cleaner. Achieving pure whites is essential. This ensures photos look professional. Follow these tips:
- Use a well-lit environment or studio lighting.
- Check camera settings to avoid underexposure.
- Edit photos to fix any color imbalance.
Remember, a camera's white balance can affect the shot. Always adjust it to match the lighting. For editing, use software like Photoshop or Lightroom. These tools refine white shades and remove any blemishes.
Acrylic Mirrors and Reflections
Acrylic mirrors bring a touch of magic to jewelry photography. These surfaces create a stunning reflection that can make any piece of jewelry seem like it's floating in an endless space. Let's dive into how they can transform your photos.
Crafting an Illusion of Depth
Using acrylic mirrors for jewelry photography adds depth to the images. This technique makes each piece stand out. Imagine a necklace catching light and casting a shadow that suggests more space. Here are some tips:
- Place the jewelry on the acrylic mirror at a slight angle.
- Adjust the lighting so it enhances the reflection without overpowering it.
- Use small stands to create different levels, adding complexity to your composition.
Avoiding Common Reflection Pitfalls
Reflections can make or break a photo. A bad reflection draws the eye away from the jewelry. To avoid this, pay attention to these points:
- Keep the mirror spotless; fingerprints or dust can ruin the effect.
- Limit background distractions that might reflect in the mirror.
- Remember to angle the camera to avoid your own reflection.
Natural Wood for Organic Appeal
Jewelry lovers admire the natural beauty in accessories. Wooden backgrounds bring out this charm in photos. Photographing jewelry on natural wood adds an organic touch. It highlights craftsmanship. It creates warmth and richness in images. Perfect for showcasing earthy tones and textures.
Complementing Jewelry with Wood Textures
Textures make a photo pop. Wood offers unique patterns. The right wood background makes a piece of jewelry stand out. Think of wood grains as art. They frame your jewelry. They tell a story. Match intricate patterns with simple jewelry designs. This contrasting approach draws the eye.
- Rustic wood for vintage pieces
- Polished wood for modern jewelry
- Wood with visible grain for texture
Selecting the Right Tone and Grain
Wood comes in various tones. Light woods work well with dark jewelry. They create a soft backdrop. Dark woods emphasize shiny and bright metals. They bring out sparkling stones. Selecting the right wood tone is crucial. It makes your jewelry photo stand out.
|
Wood Tone |
Jewelry Type |
Best Use |
|
Light Maple |
Darker Stones |
Contrast and Clarity |
|
Rich Walnut |
Silver and Gold |
Elegance and Depth |
|
Cherry Wood |
Colored Gemstones |
Warmth and Richness |
Consider wood grain too. Fine grains give sleekness. They work well with delicate jewelry. Bold grains fit statement pieces. They enhance the bold look. Always pick wood that complements your jewelry's style. It makes sure your photos look their best.
Textured Linen for a Soft Touch
When capturing the allure of jewelry, Textured Linen for a Soft Touch offers an incomparable backdrop. Not only does it evoke elegance, but the subtle textures bring out the sparkle in every gemstone. Finding the perfect linen background is key to creating an irresistible visual story for your jewelry pieces.
Why Linen Adds Warmth and Story
Linen is a go-to for photographers who want to tell a story. Its weave adds depth and character to images. The organic texture of linen provides a warm, inviting ambiance. It is ideal for showcasing jewelry as it highlights the item's details and natural beauty. This fabric’s earthy tone makes each photo feel intimate and personal.
Linen Color Choices That Enhance Gemstones
Choosing the right linen color is vital for accentuating the hues of various gemstones. Here are some top linen choices:
- Soft Gray - Perfect for silver pieces and cool-toned gems.
- Creamy White - Makes diamonds and transparent stones pop.
- Rich Black - Offers a striking contrast for bold, vibrant jewels.
The color palette you select can transform the mood of your jewelry photos. With careful selection, a linen backdrop can complement and enhance the natural beauty of gemstones, inviting viewers into a story of craftsmanship and allure.
Glitter and Glam with Sequins
Glitter and Glam with Sequins astound in jewelry photography, adding allure to the smallest of details. These backdrops reflect light, creating a dance of shimmer around precious stones. Perfect for highlighting the sparkle in each piece, sequins draw the eye and excite the senses.
Sparkling Backdrops for Eye-catching Pieces
- Bright, twinkling backgrounds enhance jewelry sparkle.
- Sequins help contrast and define intricate designs.
- Colors range from silver and gold to rainbow hues.
- Creates a festive, luxurious atmosphere in images.
Managing Sequin Backdrop Reflections
Sequins demand careful lighting to control reflections. Use diffused light to avoid harsh glares. Position the camera to minimize reflection capture. Try various angles to achieve the perfect balance of brilliance and clarity.
|
Sequin Color |
Lighting Tip |
Camera Angle |
|
Silver |
Soft, ambient illumination |
Slight tilt |
|
Gold |
Warm, diffused spotlight |
Overhead viewpoint |
|
Colorful |
Natural light mix |
Direct front |
Bokeh Lights for a Dreamy Effect
Bokeh Lights add a whimsical atmosphere to jewelry photography. These out-of-focuses, blurry backgrounds transform images. They highlight the jewelry’s detail. The magic is in the soft light dots that complement the piece’s beauty.
Creating a Bokeh Backdrop with Light
- Select a dark room for photography.
- Hang a black or dark cloth as a backdrop.
- Use a string of small LED lights.
- Place the lights at varying distances from the cloth.
- Ensure the lights are out of focus to create soft dots.
- Position the jewelry in front of this setup.
Tip: Experiment with different colors of lights for varied effects. This engages viewers better.
Camera Settings for Perfect Bokeh
|
Setting |
Description |
|
Aperture |
Use a wide aperture (low f-stop number). |
|
Lens |
A fast lens (50mm f1.8) works well. |
|
Distance |
Keep a gap between the jewelry and backdrop. |
|
Focus |
Manually focus on the jewelry piece. |
Set the camera on a tripod for stability. The correct settings ensure a sharp subject against a dreamy backdrop. Look for a sense of depth in the bokeh.
Remember, each piece of jewelry tells a story. Choose a bokeh background to enhance this narrative. It grabs the viewer's attention and creates an emotional connection. A captivating image is worth a thousand words and can lead to more sales.
Bold Patterns to Showcase Personality
Bold patterns can transform simple jewelry photos into striking displays of personality and style. They draw the eye and convey a sense of the jewelry maker's unique brand. With the right combination of scale, color, and complexity, patterned backgrounds can make jewelry pieces pop. Let's look at how to pair jewelry with the right patterns and balance them appropriately to make a statement.
Pairing Jewelry with the Right Patterns
Patterns act as a storytelling backdrop, reflecting the spirit and vibe of the jewelry.
- Geometric shapes give a modern feel to sleek, contemporary pieces.
- Floral patterns compliment delicate, feminine styles.
- Abstract designs suit bold, avant-garde jewelry.
It is critical to match the pattern with the jewelry's personality. Doing so enhances the piece's features and appeals to the target customer.
Balancing Pattern Scale and Jewelry Size
Pattern scale is the key in ensuring the jewelry stands out.
- Large patterns can overshadow small, intricate jewelry.
- Small motifs might compete with elaborate designs for attention.
A balance ensures the jewelry remains the focal point. Consider the following guidelines for a perfect match:
|
Jewelry Size |
Pattern Scale |
Example |
|
Small, Delicate Pieces |
Subtle, Fine Patterns |
Small polka dots or thin stripes |
|
Large, Statement Items |
Bolder, Broader Patterns |
Wide chevrons or large florals |
Remember, the background should never steal the show but instead serve as a stage that makes the jewelry shine.
Marble and Stone For Luxurious Context
Imagine your jewelry shining against a backdrop that speaks of elegance and quality. Marble and stone set the stage for a photo that exudes luxury. These materials not only enhance the visual appeal of your jewelry but also suggest a timeless beauty. Using marble and stone backgrounds can transform ordinary jewelry photography into something truly spectacular.
Conveying Quality with Natural Textures
Jewelry and natural stone make a perfect pair. A marble background adds sophistication to your photographs. It gives viewers a sense of the jewelry's quality without a single word. Use stone textures to make your jewelry pop. Textures range from smooth and polished to rough and rustic. Each type brings its own character to your images.
- Polished Marble - Reflects light and adds a subtle glow.
- Matte Stone - Offers a contrast that highlights the jewelry's shine.
- Rough Textures - Creates depth and interest in the background.
Lighting Techniques for Stone Surfaces
Stone surfaces require careful lighting to bring out their natural patterns. Side lighting accentuates the texture of stone, adding depth to your photos. Play with light angles to catch highlights on your jewelry. Diffuse your lights to soften shadows. This technique works well on reflective stone surfaces. It prevents harsh reflections that can distract from the jewelry.
|
Lighting Technique |
Effect |
|
Side Lighting |
Enhances texture |
|
Diffused Lighting |
Softens shadows |
|
Direct Lighting |
Highlights features |
Gradient Color Flows for Modern Vibes
The allure of Gradient Color Flows for Modern Vibes cannot be overstated for those seeking an engaging backdrop for their jewelry photography. The continuous spectrum of hues offers an eye-catching contrast, making your jewelry the star of the show. Whether capturing the sparkle of a diamond or the rich glow of gold, gradients provide a sophisticated canvas that can enhance the visual appeal of any piece.
Creating Smooth Transitions in Backgrounds
Creating a seamless gradient background is akin to painting the perfect sunrise. It's all about blending colors smoothly. Professionals use soft boxes and diffusers to achieve this effect. But, there’s a simple trick for everyone. Place a colored paper or fabric, and use a light source to create a smooth gradient. Remember, the magic happens when the light gently kisses the backdrop, transitioning from one color to another without any harsh lines.
Choosing Complementary Gradients for Jewelry Tones
Choosing the right gradient for your jewelry pieces can be like picking the perfect outfit. Complementary colors can make your jewelry pop! For silver items, try cool blues or purples. Gold goes well with warm oranges and pinks. Be mindful of the jewelry's features. Reflective pieces need subtle gradients to avoid overpowering their shine. Matte pieces, however, can stand stronger contrasts.
- Silver Jewelry: Opt for gradients with blues or purples
- Gold Jewelry: Choose warmer tones like orange or pink
- Reflective Pieces: Aim for gentle gradients; avoid stark transitions
- Matte Finishes: Can handle more vibrant gradient contrasts
Conclusion
Selecting the right background transforms jewelry images into works of art. Your choice sets the mood and enhances the piece’s allure. Black velvet, white acrylic, and natural elements are favorites. Experiment with these top ten backdrops to captivate your audience and elevate your jewelry photography to professional heights.
Related blog posts
Low Angle Photography Tips
For stunning low angle photography, get close to the ground and use a wide lens. Experiment with perspectives to add a sense of grandeur or power to your subject.

Clipping Path Associate has empowered businesses globally for over 12 years. A passionate team is dedicated to providing meticulous photo editing services. Expertise is offered in a range of areas, from precise clipping paths to flawless image retouching. The company offers straightforward yet impactful solutions tailored for photographers, e-commerce enterprises, advertising agencies, web design firms, magazine publishers, printing companies, and more.
We Accept : 