
Theodore Lowe, Ap #867-859
Sit Rd, Azusa New York
Find us here
How to Use Photoshop's Camera Raw Filter

Photoshop's Camera Raw Filter is a powerful tool. It helps photographers and designers enhance their images. This filter offers advanced editing options.
It offers a range of adjustments like exposure, contrast, and color correction. This filter is essential for photographers and designers aiming for professional-quality edits. With an intuitive interface, it allows quick and precise adjustments. You can fine-tune your images to achieve the desired look easily.
The Camera Raw Filter supports non-destructive editing, preserving the original image quality. By mastering this tool, you can significantly improve your workflow and produce stunning visuals. Whether you're a beginner or a seasoned professional, this filter can elevate your photo editing skills.
Benefits Of Using Camera Raw
Using Camera Raw offers many advantages. Here are some key benefits:
-
Non-Destructive Editing: Changes do not alter the original file.
-
Advanced Color Correction: Adjust colors with precision.
-
Detail Enhancement: Enhance image details with ease.
Camera Raw also offers quick adjustments. These include exposure, contrast, and clarity. You can make these changes fast and efficiently.
|
Feature |
Description |
|---|---|
|
Non-Destructive Editing |
Edit without changing the original file. |
|
Advanced Color Correction |
Adjust colors with great precision. |
|
Detail Enhancement |
Bring out fine details in images. |
Accessing The Camera Raw Filter
The Camera Raw Filter in Photoshop is a powerful tool. It helps you make quick adjustments to your photos. This feature is user-friendly and easy to access. Let's explore how to open and import photos into the Camera Raw Filter.
Opening Camera Raw In Photoshop
Opening the Camera Raw Filter is straightforward. Follow these steps:
-
Open Photoshop on your computer.
-
Go to the Filter menu at the top.
-
Select Camera Raw Filter from the dropdown list.
These steps will open the Camera Raw interface. Now, you can make adjustments to your photo.
Importing Photos
Importing photos into Camera Raw is also simple. Here's how:
-
Open Photoshop and go to File.
-
Select Open to choose your photo.
-
Choose the photo you want to edit.
-
Click Open to load the photo.
Once the photo is open, follow the steps in the previous section. This will bring your photo into the Camera Raw Filter.
Using these steps, you can quickly access and edit your photos in Camera Raw. Happy editing!
Basic Adjustments
The Basic Adjustments panel in Photoshop's Camera Raw Filter is your starting point for photo editing. This is where you can make essential changes to enhance your image. These adjustments can greatly improve your photo's overall look.
Exposure And Contrast
The Exposure slider adjusts the brightness of your image. Moving it to the right brightens the photo. Moving it to the left darkens it.
The Contrast slider increases or decreases the difference between light and dark areas. A higher contrast makes your photo look more dramatic. A lower contrast makes it look softer.
Highlights And Shadows
The Highlights slider affects the brightest areas of your image. Moving it to the left recovers details in bright areas. Moving it to the right makes the bright areas even brighter.
The Shadows slider adjusts the darkest parts of your photo. Moving it to the right recovers details in dark areas. Moving it to the left makes the shadows darker.
Color Correction
Color correction is a key step in photo editing. It helps make colors look natural and vibrant. Photoshop's Camera Raw Filter offers tools for this task.
White Balance
The White Balance tool adjusts the color temperature of your photo. It makes sure whites look white, not blue or yellow. Use the Temperature slider to make the photo warmer or cooler.
The Tint slider helps fix green or magenta tints. Move the slider until the colors look right. This makes your photo look natural.
Vibrance And Saturation
The Vibrance and Saturation sliders control color intensity. Vibrance adjusts the intensity of less saturated colors more than the already saturated ones. This prevents skin tones from looking too intense.
Saturation affects all colors equally. Increase it to make all colors pop. Decrease it to make colors more muted. Use both sliders to get the best look for your photo.
Detail Enhancement
Detail Enhancement in Photoshop's Camera Raw Filter helps improve image clarity. By focusing on Sharpening and Noise Reduction, you can make your photos look professional.
Sharpening
Sharpening is key for making images crisp. It enhances the edges, making details pop out.
-
Amount: Controls the strength of the sharpening effect.
-
Radius: Determines the width of the edges to sharpen.
-
Detail: Specifies how much detail to enhance.
-
Masking: Protects smooth areas from sharpening, focusing only on the edges.
|
Setting |
Description |
|---|---|
|
Amount |
Adjusts the level of sharpening applied. |
|
Radius |
Sets the size of the area around each pixel to sharpen. |
|
Detail |
Enhances fine details in the image. |
|
Masking |
Avoids sharpening smooth areas. |
Noise Reduction
Noise Reduction is crucial for creating clean images. It removes unwanted grain and artifacts.
-
Luminance: Reduces graininess in brighter areas.
-
Detail: Maintains image details while reducing noise.
-
Contrast: Balances noise reduction with contrast preservation.
-
Color: Eliminates color noise, which appears as colored speckles.
By adjusting these settings, you can achieve a perfect balance. Your images will be sharp and clean, making them more appealing.
Lens Corrections
Lens Corrections in Photoshop's Camera Raw Filter is essential for enhancing photos. This feature helps fix common lens issues. These include distortion, chromatic aberration, and vignetting. Correcting these problems improves image quality.
Removing Distortion
Distortion often occurs with wide-angle lenses. Straight lines appear curved or bent. To fix this:
-
Open your image in Camera Raw.
-
Go to the Lens Corrections tab.
-
Select the Distortion checkbox.
-
Adjust the slider until the lines are straight.
This simple step can make a big difference in your photos. Ensuring straight lines enhances the overall look.
Fixing Chromatic Aberration
Chromatic Aberration causes color fringing. It usually appears around edges of objects. To correct this:
-
Navigate to the Lens Corrections tab.
-
Check the Remove Chromatic Aberration box.
-
Use the Manual option for finer control.
-
Adjust the sliders to remove color fringes.
Fixing chromatic aberration makes your images cleaner. This enhances the overall sharpness of your photos.
Incorporate these steps into your editing workflow. Your photos will look more professional and polished.
Advanced Editing Techniques
Photoshop's Camera Raw Filter offers powerful tools for photo editing. These advanced techniques help you enhance your images creatively. Learn how to use Graduated Filters and Radial Filters for stunning effects.
Using Graduated Filters
Graduated Filters help you create smooth transitions in your photos. They are perfect for landscapes and skies. Follow these steps to use them:
-
Open your image in Camera Raw.
-
Select the Graduated Filter tool from the toolbar.
-
Click and drag to draw the filter over your image.
-
Adjust the settings to achieve the desired effect.
You can adjust the exposure, contrast, and more. The filter applies these adjustments gradually. This creates a natural look in your photos.
Applying Radial Filters
Radial Filters allow you to highlight specific areas. They are ideal for portraits and objects. Follow these steps to apply them:
-
Open your image in Camera Raw.
-
Select the Radial Filter tool from the toolbar.
-
Click and drag to draw a circular filter on your image.
-
Adjust the settings to enhance the highlighted area.
You can modify the exposure, clarity, and other settings. This helps you draw attention to important parts of your photo.
Saving And Exporting
Saving and Exporting your work in Photoshop's Camera Raw Filter is crucial. This ensures your edits are stored securely and your images are ready for various uses. This section will guide you on how to save and export your edited photos.
Saving Edits
To save your edits in Camera Raw, follow these steps:
-
Open your image in Camera Raw.
-
Make your desired adjustments using the available tools.
-
Click the Done button at the bottom-right corner.
This will save your edits and close Camera Raw. Your original file remains unchanged. Edits are stored in a separate file, known as an XMP file.
Exporting For Different Uses
Exporting your image for different uses can be done easily:
-
After editing, click the Save Image button.
-
Choose the desired file format from the dropdown menu.
-
Select the location to save your file.
-
Click Save.
You can export your images in various formats like JPEG, TIFF, or PNG. Each format serves a different purpose:
|
Format |
Best For |
|---|---|
|
JPEG |
Web use, email sharing |
|
TIFF |
High-quality prints |
|
PNG |
Web graphics, transparency |
Saving and exporting your images correctly ensures they meet your needs. Always choose the right format and resolution for your final output.
Conclusion
Mastering Photoshop's Camera Raw Filter opens up new possibilities for photo editing. This tool enhances your images effortlessly. Experiment with its features to achieve stunning results. Keep practicing and exploring to improve your skills. Embrace the creative potential it offers and transform your photos like a pro.
Related blog posts
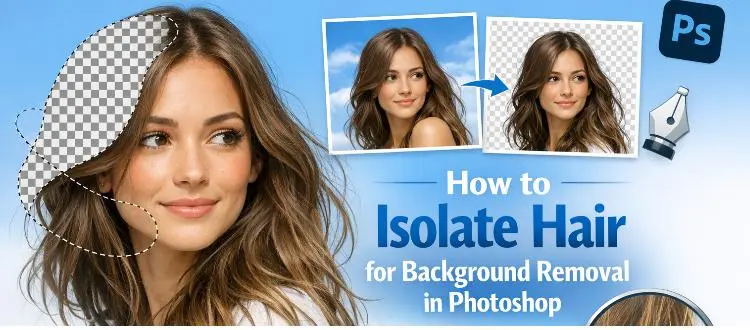
How to Isolate Hair for Background Removal in Photoshop
Are you tired of spending hours trying to perfectly isolate hair from a background in Photoshop, only to end up with messy, unnatural edges? You're not alone.
Clipping Path Associate has empowered businesses globally for over 12 years. A passionate team is dedicated to providing meticulous photo editing services. Expertise is offered in a range of areas, from precise clipping paths to flawless image retouching. The company offers straightforward yet impactful solutions tailored for photographers, e-commerce enterprises, advertising agencies, web design firms, magazine publishers, printing companies, and more.
We Accept : 