
Theodore Lowe, Ap #867-859
Sit Rd, Azusa New York
Find us here
Eye Color Changing in Photoshop: Step-by-Step Guide
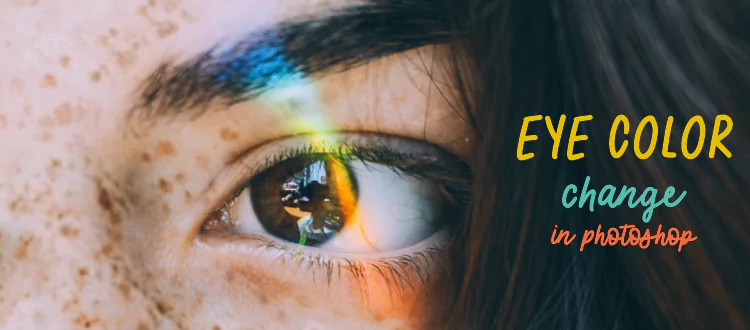
Changing eye color in Photoshop can transform your portraits dramatically. This technique is useful for photographers, designers, and hobbyists. Using the Hue/Saturation adjustment layer, you can easily select and alter the eye color without affecting the rest of the image.
Masking ensures precision and keeps the adjustments confined to the eyes. This method is quick, non-destructive, and offers endless creative possibilities. Whether you aim for a natural look or a fantastical hue, Photoshop provides the tools to make it happen. Mastering this skill adds versatility to your photo-editing repertoire.
Opening The Image In Photoshop
Changing eye color in Photoshop can be fun and creative. Let's start with opening the image in Photoshop. This step is simple and very important. Follow these easy steps to get started.
Loading The File
First, you need to load the image file. Open Photoshop on your computer. Then, click on File in the top menu. Choose Open from the dropdown menu.
A new window will appear. Find your image file on your computer. Click on the file to select it. Then, click on the Open button in the window. Your image will now appear in Photoshop.
Workspace Setup
Before you start editing, set up your workspace. This makes the editing process easier. Look at the right side of the screen. You will see different panels like Layers and Tools.
Make sure these panels are visible. If not, go to Window in the top menu. Click on Layers and Tools to make them appear.
Now, your workspace is ready. You can start changing the eye color. This setup helps you work quickly and efficiently.
|
Action |
Steps |
|---|---|
|
Open File |
File > Open > Select Image > Open |
|
Show Layers Panel |
Window > Layers |
|
Show Tools Panel |
Window > Tools |
Selecting The Eyes
One of the first steps in changing eye color in Photoshop is selecting the eyes. This step requires precision and attention to detail. The selection ensures only the eyes change color, leaving the rest of the image untouched.
Using The Lasso Tool
The Lasso Tool is a great way to select the eyes. It's found in the toolbar on the left.
-
Select the Lasso Tool.
-
Click around the eye to create a selection.
-
Connect the last point to the first to complete the selection.
Keep the selection close to the edge of the eye for best results. This helps you change only the eye color.
Refining The Selection
After using the Lasso Tool, refine the selection. This step makes the selection more accurate.
-
Go to the top menu and click on Select.
-
Select Modify and then Feather.
-
Enter a small value, such as 2 pixels.
This smooths the edges of the selection. It blends the changes naturally with the rest of the image.
Next, click on Select again and choose Refine Edge. Use the sliders to adjust the selection further.
|
Option |
Purpose |
|---|---|
|
Feather |
Softens the edges. |
|
Smooth |
Reduces jagged edges. |
|
Contrast |
Sharpens the selection edges. |
Use these options to make the selection perfect. This makes the eye color change look natural and seamless.
Changing The Eye Color
Changing the eye color in Photoshop can transform a photo. Whether for fun or professional use, this skill is handy. In this section, we explore two methods: using Hue/Saturation and applying Color Balance.
Using Hue/saturation
First, open your image in Photoshop. Select the Elliptical Marquee Tool from the toolbar. Draw a selection around the iris. Hold Shift to make a perfect circle. Next, go to the Layers Panel. Click on the Adjustment Layer icon and choose Hue/Saturation.
In the Properties Panel, check the box labeled Colorize. Adjust the Hue slider to change the color. Use the Saturation and Lightness sliders to fine-tune. For natural results, keep changes subtle. You can view the adjustments live on the image.
Here is a quick reference table:
|
Step |
Action |
|---|---|
|
1 |
Open image in Photoshop |
|
2 |
Select Elliptical Marquee Tool |
|
3 |
Draw selection around the iris |
|
4 |
Add Hue/Saturation Adjustment Layer |
|
5 |
Check Colorize and adjust sliders |
Applying Color Balance
Another method is using Color Balance. Start by selecting the iris with the Elliptical Marquee Tool. Go to the Layers Panel. Click on the Adjustment Layer icon and choose Color Balance.
In the Properties Panel, you will see three sliders: Cyan/Red, Magenta/Green, and Yellow/Blue. Adjust these sliders to change the eye color. For instance, move the Cyan/Red slider to add red hues. Move the Yellow/Blue slider to add blue hues.
Quick steps in an ordered list:
-
Select the iris with Elliptical Marquee Tool.
-
Add Color Balance Adjustment Layer.
-
Adjust Cyan/Red slider for red hues.
-
Adjust Yellow/Blue slider for blue hues.
Remember to keep changes natural. Over-editing can make the eyes look fake. Practice these methods to perfect your skills.
Enhancing The New Color
Changing eye color in Photoshop is just the beginning. Enhancing the new color brings the image to life. With a few adjustments, you can make the eyes look natural and vibrant. Below are key steps to ensure the new eye color stands out.
Adjusting Brightness And Contrast
Brightness and contrast play a crucial role in enhancing eye color. Adjusting these settings makes the new color pop. Follow these steps:
-
Select the eye layer in your layers panel.
-
Go to Image > Adjustments > Brightness/Contrast.
-
Move the sliders to adjust brightness and contrast.
A higher contrast makes the eye color more vivid. Be careful not to overdo it. Aim for a balance that looks natural.
Adding Highlights
Highlights add depth and realism to the new eye color. They create a sparkling effect that makes the eyes look lively. Here’s how to add highlights:
-
Create a new layer above the eye layer.
-
Select a small, soft brush with a light color.
-
Paint small dots or strokes on the eye to mimic light reflections.
Use the Opacity slider to adjust the intensity of the highlights. Too much highlight can make the eyes look fake. Aim for subtle, natural-looking highlights.
Here is a quick summary in table form for easy reference:
|
Step |
Description |
|---|---|
|
Adjust Brightness |
Use Brightness/Contrast slider for natural look |
|
Add Highlights |
Create a new layer, add light dots or strokes |
|
Adjust Opacity |
Lower opacity for natural highlights |
By following these steps, you can enhance the new eye color effectively. The key is to make adjustments that look natural and appealing.
Final Touches
After changing the eye color in Photoshop, the final touches make it perfect. These steps ensure the altered eye looks natural and blends seamlessly.
Smoothing Edges
Smooth edges are crucial for a natural look. Use the Blur Tool to soften the hard edges. Click on the Blur Tool from the toolbar. Adjust the brush size and strength. Gently brush around the edges of the eye color. This action blends the new color with the original eye.
Another way to smooth edges is by using the Feather Selection method. Select the eye color layer. Go to Select > Modify > Feather. Set the feather radius to around 1-2 pixels. This method softens the selection edges.
Blending Layers
Layer blending modes help integrate the new eye color. Select the eye color layer. Change the blending mode in the layers panel. Common modes to try include Overlay, Soft Light, and Color.
To adjust the intensity, use the Opacity Slider. Lower the opacity until the eye color looks natural. You can also add a Hue/Saturation Adjustment Layer. This layer allows further tweaking of the color and saturation.
Here are the steps for adding an adjustment layer:
-
Click on the Adjustment Layer icon at the bottom of the layers panel.
-
Select
Hue/Saturation. -
Adjust the sliders to get the desired eye color.
These final touches make the eye color change look professional and realistic. Follow these steps to ensure the best results.
Saving And Exporting
After you have successfully changed the eye color in Photoshop, the next step is saving and exporting your work. This ensures your image retains its quality and is ready for various uses. Below, we’ll discuss the best practices for saving and exporting your edited images.
Choosing File Formats
Choosing the right file format is essential for maintaining quality. Here are some common formats:
-
JPEG - Great for photos, but may lose some quality.
-
PNG - Ideal for graphics with transparent backgrounds.
-
TIFF - Best for high-quality prints, but large file size.
-
PSD - Keeps all layers intact for future editing.
For eye color changes, JPEG and PNG are popular. They offer a good balance between quality and file size.
Optimizing For Web
Optimizing images for the web ensures they load quickly and look great. Here are some tips:
-
Resize the image to fit web requirements. Smaller dimensions load faster.
-
Use the "Save for Web" option in Photoshop. This tool helps reduce file size.
-
Choose the right file format. For websites, JPEG and PNG are ideal.
-
Set the quality to around 70-80%. This offers a good balance.
These steps help your images load faster without losing much quality.
|
File Format |
Best Use |
Quality |
File Size |
|---|---|---|---|
|
JPEG |
Photos |
Good |
Medium |
|
PNG |
Graphics |
Excellent |
Medium |
|
TIFF |
Prints |
Excellent |
Large |
|
PSD |
Editing |
Excellent |
Large |
Conclusion
Transform your photos with the simple yet impactful technique of changing eye color in Photoshop. Mastering this skill can significantly enhance your images. Practice regularly, experiment with different colors and settings, and watch your creativity shine through in more captivating photos.
Related blog posts
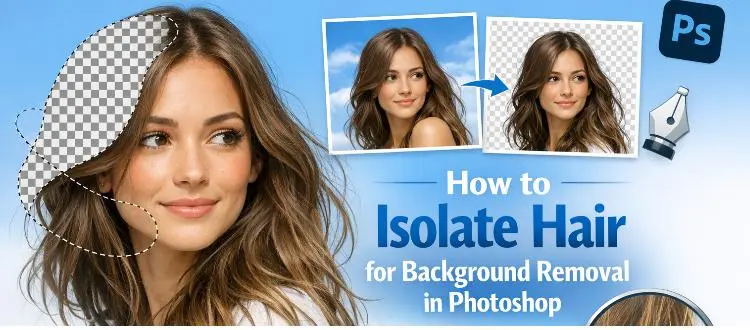
How to Isolate Hair for Background Removal in Photoshop
Are you tired of spending hours trying to perfectly isolate hair from a background in Photoshop, only to end up with messy, unnatural edges? You're not alone.
Clipping Path Associate has empowered businesses globally for over 12 years. A passionate team is dedicated to providing meticulous photo editing services. Expertise is offered in a range of areas, from precise clipping paths to flawless image retouching. The company offers straightforward yet impactful solutions tailored for photographers, e-commerce enterprises, advertising agencies, web design firms, magazine publishers, printing companies, and more.
We Accept : 