
Theodore Lowe, Ap #867-859
Sit Rd, Azusa New York
Find us here
Complete Hat Photography Guide for Beginners: Start Snapping!
Imagine the satisfaction of snapping that picture-perfect image, one that tells a story and grabs attention instantly. In this complete guide for beginners, we'll walk you through everything you need to know to master the art of hat photography. From choosing the right lighting and angle to styling tips that make your shots stand out, this guide is crafted to boost your confidence and creativity.
By the end, you'll be equipped with the know-how to transform ordinary hat photos into extraordinary visual narratives. Ready to unlock the secrets of standout hat photography? Let's dive in!
Choosing The Right Equipment
Choosing the right equipment is crucial in hat photography for beginners. The right tools can make or break your photo shoot, transforming your vision into stunning images. But how do you decide what equipment suits your needs? Let's break it down into manageable pieces so you can confidently capture those perfect shots.
Camera Basics
Your camera is the heart of your photography setup. It's important to understand its capabilities before diving into hat photography. Do you prefer a DSLR or a mirrorless camera? Each has its strengths; DSLRs often offer better battery life, while mirrorless cameras are lighter and more compact.
Consider the resolution and sensor size. Higher resolution cameras produce sharper images, which is key when capturing intricate hat details. A larger sensor can enhance low-light performance—an advantage if you plan to shoot indoors or under dim lighting.
Test different models, if possible, to find one that feels comfortable and intuitive in your hands. Your comfort can directly affect your confidence and creativity during shoots.
Essential Accessories
Accessories can elevate your photography game. A tripod is a must-have for stable shots, especially useful in close-up hat photography where every detail matters. Look for one that's sturdy yet lightweight for easy transport.
Lens choice is another factor. A macro lens can capture the fine textures and craftsmanship of a hat, while a portrait lens can create beautiful depth and focus on your subject. Experiment with both to see which best suits your style.
Don't overlook memory cards and batteries. Always have extras on hand—running out of storage or power mid-shoot is frustrating and can disrupt your creative flow.
Lighting Setup
Lighting can transform a photo from ordinary to extraordinary. Natural light is perfect for outdoor shoots, providing soft, flattering illumination. But what if the sun's not cooperating?
Consider investing in portable LED lights or softboxes for indoor sessions. These can mimic natural light, offering control over intensity and direction. Play around with different setups to see how shadows and highlights affect your hat's appearance.
Reflectors are also handy tools. They can bounce light into areas where shadows lurk, adding dimension and depth to your images. A simple piece of white cardboard can sometimes do the trick—don't hesitate to get creative with what you have!
What are your thoughts on these equipment choices? Do any of these insights resonate with your photography ambitions? Equip yourself well, and you'll find that capturing stunning hat photos becomes not just a possibility, but your new reality.
Understanding Hat Styles
Explore the world of hat styles with a beginner-friendly photography guide. Capture each design's unique features and textures. This guide helps you understand lighting and angles for perfect hat photos.
Understanding hat styles is crucial for any beginner looking to capture stunning hat photographs. From floppy sun hats to sleek fedoras, each hat type tells a unique story. Knowing these styles will help you choose the right hat to photograph and convey the mood you desire.
Popular Hat Types
Explore the world of hats with popular types like beanies, fedoras, and baseball caps. Beanies provide a casual, cozy look, perfect for winter shots. Fedoras exude elegance and sophistication, often used in fashion photography. Baseball caps are versatile, offering a sporty vibe that appeals to a wide audience. Each style presents different opportunities for creativity in your shots. Which hat type resonates with you?
Material And Texture Considerations
Material and texture can transform the look and feel of a hat photograph. A wool hat offers warmth and softness, ideal for autumn-themed photos. Leather hats bring a rugged and edgy appeal, perfect for outdoor adventures. Consider the texture—does the hat have a smooth finish or a rugged texture? These details can add depth to your images and evoke different emotions.
Color And Pattern Variations
Colors and patterns can dramatically alter the mood of your hat photography. A bright red hat can create a bold focal point, while neutral tones offer subtle elegance. Patterns like stripes or floral designs can add dynamism and character to your shots. Think about how color and pattern interact with the background and lighting. Do you prefer a minimalist approach, or do you want your hat to stand out? Your choice will shape the narrative of your photograph. Understanding these elements can elevate your photography skills. Which aspect will you experiment with first?
Mastering Composition
Mastering composition is crucial in hat photography. It transforms simple shots into stunning visuals. Good composition guides the viewer's eye and adds depth. It enhances the hat's style and context. This section will cover essential techniques to improve your hat photography.
Framing Techniques
Framing techniques help focus attention on the hat. Use natural frames like doorways or windows. They draw the viewer’s eye toward the subject. Experiment with angles. Capture the hat from various perspectives. This creates unique and engaging images.
Balancing Elements
Balance is key in composition. Position the hat to create harmony in the shot. Use the rule of thirds. Place the hat off-center for dynamic balance. Consider the background elements. Ensure they complement the hat, not distract from it.
Creating Visual Interest
Visual interest keeps the viewer engaged. Use contrasting colors to make the hat stand out. Incorporate textures for depth and intrigue. Play with light and shadows. They add drama and highlight the hat's features. Experiment with these elements for captivating photographs.
Lighting Techniques
Lighting is crucial in hat photography. It can make or break your photos. Proper lighting highlights the hat's texture, color, and design. Understanding how to use light transforms your images. Explore different lighting techniques to enhance your hat photography skills.
Natural Vs Artificial Light
Natural light is soft and flattering. It enhances the hat's natural colors. Shoot during the golden hour for best results. The golden hour is just after sunrise or before sunset. It casts a warm, gentle glow. Artificial light offers more control. Adjust brightness and direction to suit your needs. Use lamps or studio lights for consistency. Both lighting types have their benefits. Choose based on the mood you want to create.
Softening Shadows
Shadows add depth but can overwhelm details. Soften them to keep focus on the hat. Use a diffuser to spread the light evenly. White sheets or translucent materials work as diffusers. Position them between the light source and the hat. This reduces harsh shadows, creating a balanced look. Another method is using a reflector. Reflectors bounce light back onto the hat. This fills in the shadows and enhances the overall look.
Highlighting Details
Details make a hat unique. Good lighting highlights these features. Focus on the hat's texture, stitching, and patterns. Use side lighting to emphasize these elements. Side lighting creates subtle shadows, accentuating details. Experiment with the light's angle. Adjust until you achieve the desired effect. Pay attention to the highlights and shadows. They bring out the hat's character.
Background And Setting
Creating the perfect background and setting is crucial in hat photography. It can transform a simple image into a captivating story. The right environment highlights the hat's design and colors. Let's explore how to craft this essential element.
Choosing The Right Background
The background should complement the hat, not compete with it. A neutral backdrop keeps the focus on the hat's details. Soft pastels or whites are popular choices. They enhance the hat's features without distraction. Consider the hat's style when selecting a background. Vintage hats pair well with classic settings. Modern designs shine against sleek, minimal backdrops.
Creating A Mood
Setting the mood involves more than just lighting. It’s about the story you want to tell. A rustic setting evokes a nostalgic feeling. A cityscape backdrop adds a touch of urban chic. Play with shadows and light to add depth. The right mood makes the hat stand out. It creates an emotional connection with the viewer.
Incorporating Props
Props can add context and interest to your photos. They should match the hat's theme. A straw hat pairs well with beach elements. A top hat might suit a formal setting with elegant props. Keep props simple and relevant. They should enhance, not overshadow, the hat. A well-chosen prop completes the visual story.
Tips For Capturing Movement
Capturing movement in hat photography adds life to your shots. Movement can showcase the hat's design and its dynamic appeal. It's crucial to understand how to photograph action effectively. This section offers tips for capturing movement in hat photography.
Action Shots
Action shots bring energy to your photos. They highlight the hat in real-life scenarios. Try capturing moments where the hat is worn during activities. This could be walking, jumping, or dancing. Use a fast shutter speed to freeze motion. This helps create crisp images of the hat in action. Direct your subject to move naturally. This gives an authentic feel to the photos.
Dynamic Poses
Dynamic poses add flair to your hat photography. Encourage your subject to use expressive body language. Movement can be subtle, like a tilt of the head. Or dramatic, like a spin or leap. Experiment with angles and perspectives. Capture the hat from different viewpoints. This adds depth and interest to the image. Engage your subject to create energetic poses that tell a story.
Using Motion Blur
Motion blur can enhance the sense of movement. It creates a soft, dreamy effect. Lower the shutter speed to introduce motion blur. This blurs the background while the hat stays in focus. It creates an artistic look. This technique adds drama and excitement to your shots. Use it sparingly to avoid losing clarity in your subject. Balance is key for stunning motion blur effects.
Conclusion
Capturing stunning hat photos is now within your reach. Start with basic techniques. Experiment with lighting and angles. Practice makes perfect. Use natural light for soft, warm tones. Try different backgrounds for variety. Pay attention to details. Adjust focus for sharp images.
Explore creative ideas. Use props to add interest. Remember, patience is key. Keep learning and trying new things. With dedication, your hat photography skills will grow. Enjoy the process and have fun. Your unique style will soon shine.
Related blog posts
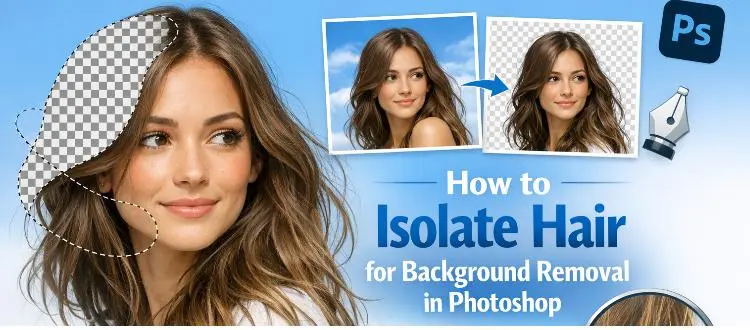
How to Isolate Hair for Background Removal in Photoshop
Are you tired of spending hours trying to perfectly isolate hair from a background in Photoshop, only to end up with messy, unnatural edges? You're not alone.
QR Codes in Photography: Unlocking Creative Possibilities
Imagine transforming your photography into an interactive experience that captivates your audience. QR codes are revolutionizing the way we share and engage with images.

Clipping Path Associate has empowered businesses globally for over 12 years. A passionate team is dedicated to providing meticulous photo editing services. Expertise is offered in a range of areas, from precise clipping paths to flawless image retouching. The company offers straightforward yet impactful solutions tailored for photographers, e-commerce enterprises, advertising agencies, web design firms, magazine publishers, printing companies, and more.
We Accept : 