
Theodore Lowe, Ap #867-859
Sit Rd, Azusa New York
Find us here
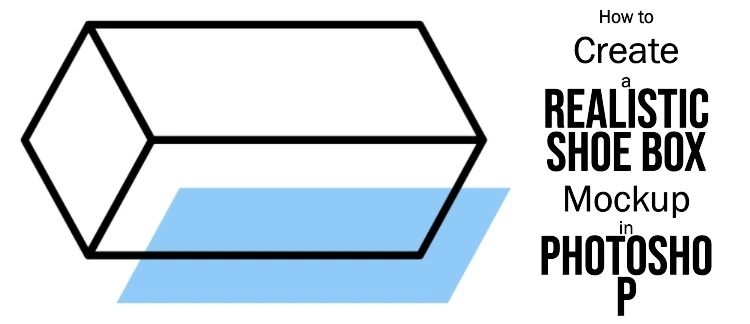
How to Create a Realistic Shoe Box Mockup in Photoshop
Whether you're a seasoned designer or a beginner eager to learn, mastering this skill can set you apart in the competitive world of design. You'll discover a step-by-step guide to crafting a stunning shoe box mockup that looks just as good on screen as it would in real life.
We'll walk you through each stage, ensuring you understand the tools and techniques needed to achieve a high-quality result. Get ready to elevate your design game and create visuals that captivate attention and drive engagement. Dive in, because the secret to an eye-catching shoe box design is just a few clicks away.
Gather Materials
Start by gathering essential materials like high-quality shoe box images and Photoshop software. Collect textures and design elements to enhance realism. Ensure all resources are organized and ready for use in your mockup project.
Creating a realistic shoe box mockup in Photoshop is an exciting project. Before diving into the design process, gather the necessary materials. This ensures a smooth workflow and a professional result. Let's explore the key components you'll need for this creative task.
Photoshop Software
First, secure a reliable version of Photoshop. This powerful tool offers diverse features for mockup creation. Ensure your software is updated to the latest version. This guarantees access to all essential functions. Familiarize yourself with basic tools like layers and masks. They play a crucial role in designing realistic mockups.
Shoe Box Image
Next, source a high-quality shoe box image. Look for images with clear details and good lighting. This forms the base of your mockup. Consider photographing a physical box if possible. Ensure the image resolution is high. This allows for better editing and detailing.
Textures And Patterns
Textures and patterns add depth to your mockup. Gather a variety of these elements. They enhance the realism of your design. Look for textures that mimic cardboard or paper. Patterns can reflect brand themes or styles. Save them in a format compatible with Photoshop. This ensures seamless integration into your project.
Set Up Document
Crafting a realistic shoe box mockup in Photoshop involves setting up a precise document. Start by defining the box dimensions in a new project. This foundation is key to an authentic visual presentation.
Creating a realistic shoe box mockup in Photoshop begins with setting up your document correctly. This foundational step is crucial for ensuring that your design is both professional and practical. Getting the dimensions and resolution right can make all the difference in the final look of your mockup. This guide will help you set up your document like a pro, so you can focus on designing without worrying about technical hiccups.
Canvas Size
Choosing the right canvas size is essential for your shoe box mockup. Start by considering the actual dimensions of a standard shoe box. Typically, a shoe box measures around 13 x 9 x 5 inches. However, if you're designing a box for specialty shoes, adjust accordingly. When inputting these dimensions into Photoshop, remember to convert inches to pixels. This ensures your design scales accurately. If you’ve ever found your design looking distorted, it’s likely due to incorrect canvas sizing.
Resolution Settings
Resolution settings are just as important as canvas size. A resolution of 300 DPI (dots per inch) is ideal for print designs. This gives you crisp, clear images and text. If you’ve ever printed a design only to find it blurry, it’s likely because the resolution was too low. In Photoshop, set your resolution before you start designing. This prevents you from having to redo work later. High resolution settings might make files larger, but they ensure quality output. Would you prefer a detailed design or a pixelated mess? Make setting up your document a priority. With the right canvas size and resolution, you're laying the groundwork for a stunning shoe box mockup. Wouldn't you want your design to stand out for all the right reasons?
Import Shoe Box Image
Crafting a realistic shoe box mockup in Photoshop involves selecting a high-quality image. Ensure clarity and proper lighting for best results. Position and scale the image correctly to match your design needs, adding shadows and highlights for authenticity.
Creating a realistic shoe box mockup in Photoshop is a rewarding task that can elevate your design skills to new heights. A crucial step in this process is importing the shoe box image. This part of the journey is where your creativity starts to take shape. Let's dive into how you can seamlessly integrate your shoe box image into Photoshop and bring your mockup to life.
Image Placement
Begin by opening Photoshop and creating a new document. Choose dimensions that match the size of your shoe box. Next, import your shoe box image by clicking on "File" and selecting "Place Embedded." This action will allow you to browse your computer for the image you want to use. Once selected, the image will appear in your Photoshop document, ready for the next steps. Adjust the position of your image on the canvas. Use the move tool to drag it into the perfect spot. Consider how your shoe box will be viewed in real life. Does it look natural in the space you've given it?
Adjust Dimensions
Once your image is placed, it's time to ensure it fits perfectly within your design. Use the "Transform" function by pressing Ctrl+T (Cmd+T on Mac). This allows you to resize the image by dragging the corners while holding the shift key to maintain proportion. Check the dimensions against your canvas size. If the image feels too large or small, adjust accordingly. This step is crucial for achieving a realistic look in your mockup. Think about how the shoe box would look on a shelf. Are the proportions accurate to real life? Small tweaks can make a significant difference in visual appeal. When I first started creating mockups, I often skipped fine-tuning dimensions, assuming the initial placement was enough. However, I learned that taking an extra moment to adjust size and scale can transform a simple image into a compelling mockup. What adjustments will you make to perfect your design?
Apply Base Colors
Begin by selecting base colors that match the shoe box's design. Applying these colors evenly creates a realistic foundation. Use the paint bucket tool to fill sections with chosen hues, providing a lifelike appearance.
Applying base colors to your shoe box mockup in Photoshop is a fundamental step that sets the tone for your entire design. It’s like laying the foundation of a house; everything else builds upon it. Whether you’re a seasoned designer or a beginner, getting this part right can make a significant difference in how realistic your final mockup looks. So, let’s dive into the essentials of applying base colors.
Color Selection
Choosing the right colors is crucial. Think about the brand or the message you want to convey through your design. If you’re working on a luxury shoe box, you might opt for deep, rich tones like navy or burgundy. Use the color palette tool in Photoshop to experiment with different shades. Don't hesitate to try out unexpected combinations. You might discover a unique look that sets your design apart. Ask yourself what emotions or ideas these colors evoke. Are they aligned with the purpose of your mockup?
Layer Management
Layers in Photoshop are your best friends. They help you manage different elements of your design seamlessly. By Clipping Create separate layers for each part of the shoe box – the lid, the sides, and the inside. This way, you can tweak colors without affecting the entire design. Imagine wanting to change the shade of the lid but accidentally altering the whole box because you didn’t use layers. It’s a headache you want to avoid. Name each layer clearly, like “Lid Color” or “Side Panel.” This small step saves you time and confusion later on. Remember, efficient layer management leads to a smoother design process. How do you keep track of colors and layers in your own projects? Share your tips or struggles in the comments below!
Add Textures And Patterns
Textures and patterns bring a shoe box mockup to life in Photoshop. They add depth and realism, making the design more appealing. Experiment with various textures to achieve a visually striking effect.
When creating a realistic shoe box mockup in Photoshop, adding textures and patterns can elevate your design from basic to professional. Textures can give your mockup a tactile feel, making it look more like the real thing. Patterns, on the other hand, can add visual interest and help your design stand out. Let’s explore how to effectively apply textures and overlay patterns to bring your shoe box mockup to life.
Texture Application
Textures can make or break the realism of your mockup. Start by choosing a texture that aligns with the material of the shoe box you’re designing. Whether it's a smooth cardboard or a rugged leather, the right texture adds depth. To apply a texture, first, find a high-resolution image that matches your desired look. Load it into Photoshop and drag it over your shoe box layer. Use the Clipping Mask feature by right-clicking the texture layer and selecting “Create Clipping Mask” to ensure it only covers the shoe box. Adjust the Blending Mode of the texture layer. Options like Overlay or Soft Light often work well for a subtle effect. Experiment with different modes to see which one enhances your design best.
Pattern Overlay
Patterns can turn a plain shoe box into a captivating design. Choose a pattern that complements your brand or the theme of the shoe. From stripes to polka dots, the possibilities are endless. To add a pattern, create a new layer above your shoe box design. Navigate to Edit > Fill and select Pattern from the dropdown menu. Choose from the default patterns or import your own for a custom look. Once applied, use the Opacity slider to control the intensity of the pattern. This helps in maintaining a balance between the pattern and the underlying design. Have you ever noticed how some designs just click? Often, it's the seamless integration of textures and patterns that does the trick. Experimentation is key. Don’t be afraid to mix and match different textures and patterns. Sometimes, the unexpected combination is what makes a design truly unique. So, what textures and patterns will you choose for your shoe box mockup?
Incorporate Branding Elements
Enhance your shoe box mockup by adding branding elements like logos and color schemes. Use Photoshop tools to create realistic textures and shadows, bringing your design to life. Personalize every detail to ensure your mockup effectively represents your brand identity.
Creating a realistic shoe box mockup in Photoshop is an exciting project that allows you to showcase your design skills while bringing a brand to life. A crucial part of this process is adding branding elements that make the mockup look authentic and professional. Focusing on details like logo placement and typography choices can elevate your mockup from basic to brilliant.
Logo Placement
The logo is often the first thing people notice on packaging. Consider its size and position carefully. A well-placed logo can make your shoe box instantly recognizable and memorable. Think about the brand's identity. Is it bold and daring, or subtle and sophisticated? If the brand is bold, a larger logo on the center of the lid might work well. For a more understated brand, a smaller logo in the corner can keep the design elegant. Remember, the logo should enhance the design, not overpower it. Test different placements by printing a draft. Does the logo catch your eye or blend into the background? Your goal is to strike the perfect balance.
Typography Choices
Typography is more than just picking a font. It's about conveying the brand's message and personality through text. Choose fonts that align with the brand's image and values. If the brand is modern and trendy, a sleek, sans-serif font might be appropriate. For a classic, high-end brand, consider a serif font that exudes sophistication. Keep consistency in mind; use the same font family for all text elements to maintain a cohesive look. Avoid clutter by limiting the number of fonts. Stick to two or three to keep the design clean and professional. Test how the typography looks in various lighting and settings to ensure readability and appeal. How would the typography look from a distance or in a store setting? This consideration can help you choose sizes and colors that work well in real-life scenarios. By adding thoughtful branding elements like logo placement and typography, you can create a shoe box mockup that not only looks realistic but also resonates with the brand’s identity. What design choices will make your mockup stand out?
Create Shadows And Highlights
Creating shadows and highlights in your shoe box mockup brings it to life. These elements add depth, making your design look realistic. Shadows and highlights help simulate real-world lighting conditions. This guide will walk you through the basics of creating them in Photoshop.
Shadow Techniques
Start with a new layer beneath your shoe box design. Select a soft round brush with a low opacity. Use black to paint the shadow areas. Focus on the edges and corners of the box. Adjust the layer's opacity to blend the shadow naturally. Experiment with the Gaussian Blur filter for a softer shadow.
Consider the light source direction. This helps in placing shadows correctly. Use the Transform tool to modify shadow shapes. This makes them look more realistic. Keep shadows subtle to avoid overpowering your design.
Highlight Enhancements
Create a new layer above your design for highlights. Choose a white or light-colored brush. Paint highlights on the top and edges where light hits directly. Use the Dodge Tool for precise highlight adjustments. Set it to a low exposure for a gradual effect.
Pay attention to the light intensity. This affects the brightness of your highlights. Experiment with different blending modes. Overlay or Soft Light can enhance highlight effects. Maintain a balance between shadows and highlights for a realistic look.
Finalize And Save
Finalizing your shoe box mockup in Photoshop is the last step. It's crucial to ensure your design looks polished and professional. After completing the design, saving it correctly is important. This ensures the mockup is ready for sharing or printing. Let's explore how to review layers and export options.
Review Layers
Check each layer in your Photoshop file. Confirm all layers are visible and correctly aligned. Double-check text layers for spelling errors. Make sure the images look sharp and clear. Adjust any misaligned elements to perfect the design. Hide any unnecessary layers to keep the file clean. This ensures a tidy and professional appearance.
Export Options
Choose the right export format for your mockup. For web use, save as a JPEG or PNG file. Need high-quality prints? Use TIFF or PSD formats for best results. Go to 'File', then 'Export', and pick your desired format. Set the resolution to 300 dpi for print quality. For web, 72 dpi is usually sufficient. Save your file in a dedicated folder for easy access later. This keeps your work organized and easily retrievable.
Conclusion
Creating a realistic shoe box mockup in Photoshop is simple. Follow each step closely. Experiment with colors and patterns. Your creativity brings the design to life. Practice makes perfect. Improve your skills with every attempt. Use layers wisely. Adjust shadows for depth.
Realism enhances presentation. Attract clients with stunning visuals. Mockups are essential for showcasing ideas. Share your designs with confidence. Feedback helps refine your craft. Remember, patience is key. Stay curious and keep learning. Engage with the design community. You'll grow as a designer.
Keep exploring new techniques. Your mockups will impress.
Related blog posts
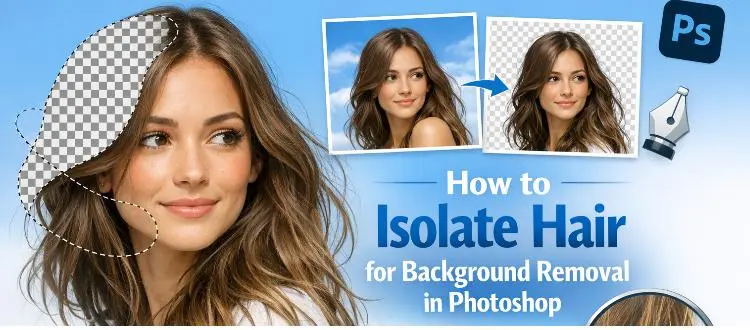
How to Isolate Hair for Background Removal in Photoshop
Are you tired of spending hours trying to perfectly isolate hair from a background in Photoshop, only to end up with messy, unnatural edges? You're not alone.
Clipping Path Associate has empowered businesses globally for over 12 years. A passionate team is dedicated to providing meticulous photo editing services. Expertise is offered in a range of areas, from precise clipping paths to flawless image retouching. The company offers straightforward yet impactful solutions tailored for photographers, e-commerce enterprises, advertising agencies, web design firms, magazine publishers, printing companies, and more.
We Accept : 